With so many styles of coffee table to choose from, including stylish contemporary acrylic and classically good looking wood, it would be surprising if you couldn’t find something to suit your taste. But if you’ve picked up an old table from the thrift shop, or just fancy changing the look of your existing one, and putting your own stamp on it, there’s lots you can do to give your room a new flavor.
While making a stunningly unique coffee table from scratch could require a few more DIY skills than you may have, just painting your table can give it a whole new style.
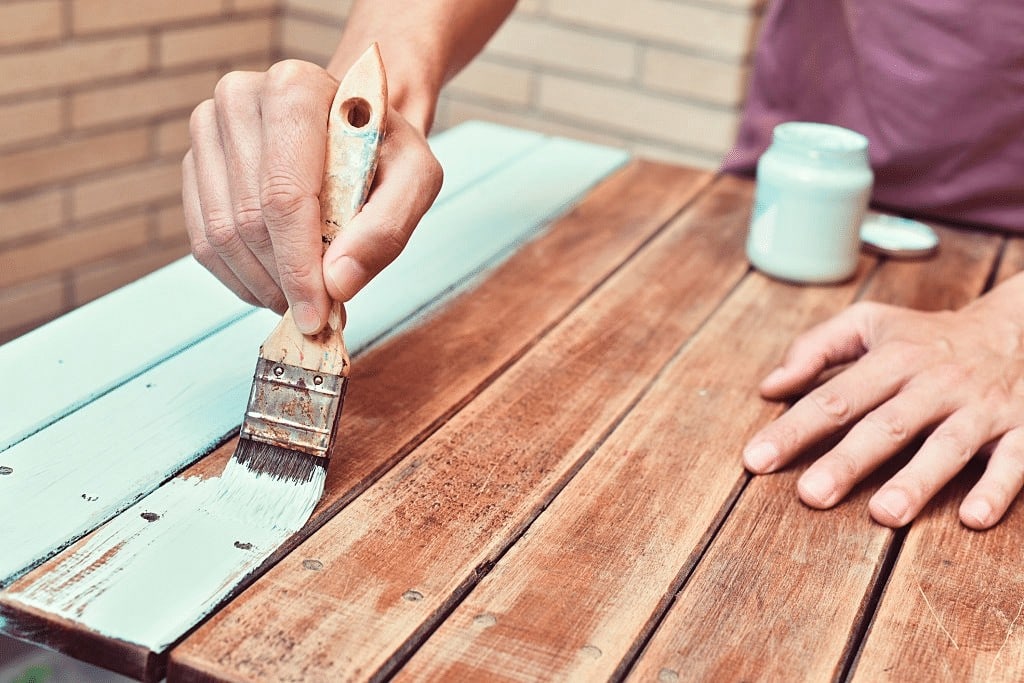
Painting your coffee table
This can be adapted, depending on what your table is made of, but we’re assuming here that it’s made of wood.
You’ll need:
- Various grades of sandpaper from coarse to fine
- Sanding block
- Roller and paint brushes
- Primer
- Paint
- Top coat eg finishing wax
- Preparation is everything. If this isn’t carried out diligently the paint could peel or chip, and the final surface won’t be smooth. Remove any drawers, and using hot soapy water and a sponge, give the entire coffee table and drawers a good wash to remove any dirt, grime or grease. Leave to air dry.
- Once it’s completely dry, start sanding. This needs to be done whether the current finish is painted or bare wood. However, if you plan to repaint, there’s no need to remove all the old paint. Just provide a roughened surface – called a key, which allows the new paint to adhere properly.
- Use the sanding block with a strip of medium grade wrapped around it. A block eliminates the risk of skinned knuckles, and leaves a smooth and even surface. Ensure you are sanding in the same direction of the wood grain. Going against the grain can leave scored wood behind.
- Once the surface feels smooth, change to a fine grade sandpaper, if you aren’t planning on painting your table, but instead, want a gorgeous natural wood finish.
- However, if you are going to use paint, it’s time to add the primer. Make sure all the surfaces, corners and joints are dust-free and start painting. An oil-based primer is a great choice for furniture, and although it takes longer to dry than a water-based one, the final finish and overall durability is well worth it.
- Once the first coat is completely dry, go over it with the finer grade sandpaper. This ensures a professional quality finish. Remove any loose dust, and if your primer looks streaky, add another coat. Sand and dust again.
- Now, paint time. An interior latex paint works extremely well for furniture, with either a gloss or semi gloss finish. Both of these finishes provide a surface that easy to wipe over and clean.
- We prefer to use a small foam roller on the table top and large flat surfaces as this eliminates any visible brush marks, and then use a small brush for legs and harder to reach areas.
- Use several thinner layers, rather than one thicker one, and remember to sand and dust down in between each one.
- Leave your last coat to dry for at least 24 hours, before sealing your table. This protects the painted surface, and ensures a wipe-clean surface. Furniture wax is a much better choice than varnish, which can cause lighter paints to yellow over time. Just brush or wipe it all over the table, wait 10 – 15 minutes and wipe it off, buffing until you achieve shininess.
- Leave it alone for another day or so to allow the wax to soak through properly and there you go – one gorgeous new table that looks a million dollars!
Transform with découpage
Découpage is the on-trend look for this year and it’s so amazingly simple to create a completely unique and unusual finish. By glueing colored paper cutouts onto your coffee table, adding in some gold leaf, or paint effects, pictures from magazines, calendars or wrapping paper – in fact, anything goes, and varnishing the whole lot, you can very easily turn a boring old coffee table into something wonderful that screams style and originality!
You’ll need:
- Cut out pictures, paper, Dutch gold leaf etc
- Various grades of sandpaper and sanding block
- Glue – you’ll need a lot
- Brushes
- Primer and paint if required
- Wash down the table thoroughly and leave to dry.
- Using the sandpaper and block, sand down the surfaces to provide a rough surface for the glue to adhere to.
- Wipe the table over, removing any dust and debris as this will prevent the paper from sticking down properly.
- If you wish to leave some part of the table bare, without paper on them, such as the legs, then either continue sanding using a finer grade paper to produce a gorgeously smooth natural wood finish, or carefully brush on the primer, followed by the paint, allowing plenty of time to dry between applications.
- Now for the fun part! The possibilities are endless. Use whole sheets from magazines, pick a theme – butterflies for example, and cut out pictures of them, or a color scheme, and choose pictures or pieces of paper that fit in with your scheme. Use shiny paper, wrapping paper, your favorite birthday cards, anything you like – even photos of your friends and family. You can add Dutch gold leaf, or paint in bright colors, in between, or cover the surface, or table in its entirety completely. The choice is yours.
- Starting at the center and working outwards, begin sticking your cut outs down. Be generous with the glue – you have a lot of paper to stick! As you go, gently smooth down the cut outs with a ruler, unwanted store card, or a specialist smoothing tool, making sure any air bubbles are removed.
- If you have any paper overhanging the edge, don’t remove it yet.
- Let everything dry before brushing on more glue and leaving it to dry thoroughly again.
- Using a fine grade sandpaper and the block, go around the edge, sanding away any excess paper.
- Finish with another layer of glue.
- If you wish you can add more layers of paper, as before.
- Once your table is complete, spray on a layer of acrylic varnish. Avoid polyurethane varnish as it can, over time, discolor, turning all your hard work yellow.
- Stand back and admire your awesome new coffee table!
Here’s some more fabulous makeover ideas for your old coffee table, and if you’re still stuck, watch this video for even more:
