It’s Easier Than You Think
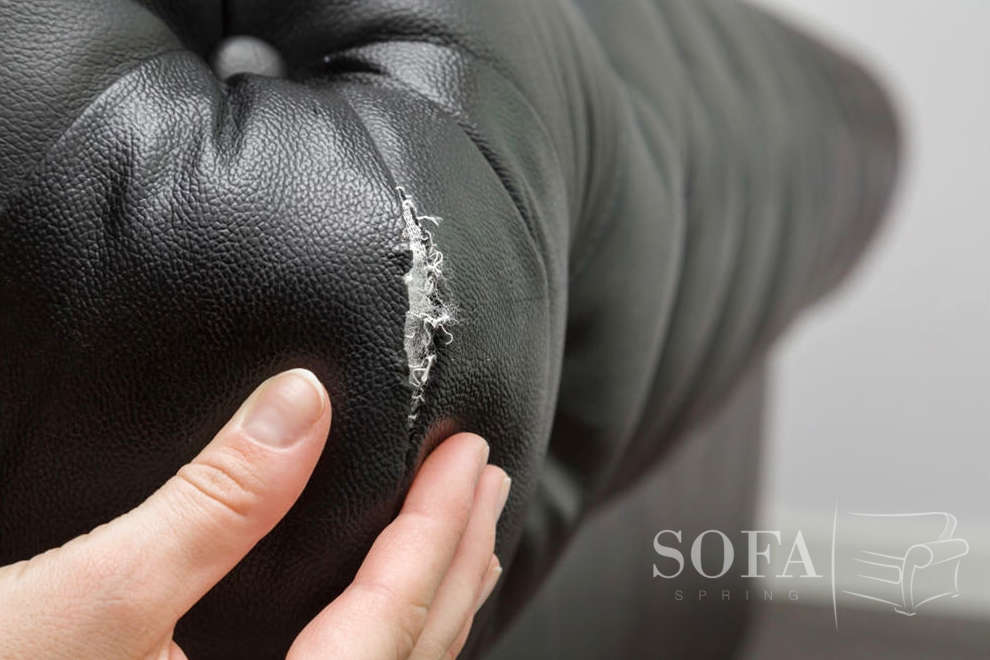
With the best will in the world, something was bound to happen to your gorgeous leather sofa. You’ve lovingly cleaned and polished it for ever, it’s comfortably accommodated the whole family and friends without fail, and has been part of some awesome memories. But now, in a heart stopping moment, you notice A TEAR! Your precious leather sofa has a flaw!
So, how can you repair it, and get your sofa looking fabulous again?
If the tear is fairly small, you’ll need:
- Rubbing alcohol or white vinegar
- Leather glue
- Leather dye matching your sofa color
- Sponge
- Wipe the area over with the rubbing alcohol or white vinegar to remove any grease, before carefully applying the glue to the underside of the flaps.
- Very gently, ease the flaps back together while the glue is still wet. Ensure that the material underneath is tucked away and hidden, and make sure the tear is realigned correctly.
- Wipe away the excess glue before it has a chance to dry.
- Once dry, it the tear is still visible, apply a tiny amount of leather dye to the area with a damp sponge, and allow to dry.
- Polish your sofa as normal
- Wait at least an hour before using the sofa to allow the glue to completely dry and settle.
If the tear involves a seam, here are some handy tips to repair it easily and effectively.
For larger tears that expose a lot of the substrate underneath, you should include a leather, or durable fabric patch to add strength to your repair.
You’ll need:
- Rubbing alcohol or white vinegar
- A Leather repair kit – these are readily available online or from your local hardware store. But if you don’t have one, never fear.
- A leather, or some other strong hard wearing fabric patch, cut slightly larger than the tear, with rounded corners.
- Leather or fabric glue
- Leather filler – included in your leather repair kit, or available separately
- Leather dye that matches the color of your sofa
- Wipe the area with rubbing alcohol or white vinegar to remove any grease.
- Insert the patch into the tear, smoothing it out so that the substrate is completely covered, and the edges are nicely tucked it.
- Apply glue to the underside of the tear, wherever it touches the patch, gently pulling the edges as close together as you can.
- Ensure the edges of the patch and the top surface are as smooth as possible.
- Wipe away the excess glue.
- Holding a book, or something similar, over the repair, apply smooth, even pressure while the glue dries. This should take approximately twenty minutes or so.
- Apply rubbing alcohol to the area again, and wipe away any grease.
- Very carefully trim away and loose fibers creating a flush surface.
- If the tear is still visible, or there is a gap between the join, using a very small amount, apply the leather filler to fill the gaps.
- Use the flat side of a knife to scrape away the excess, leaving a beautifully smooth, flush finish.
- Wait until it’s completely dry. Refer to the manufacturer’s instructions for drying times.
- If the repair still feels uneven or rough, add more leather filler.
- Once you’re happy with it, carefully brush on the leather dye. Leave it to dry and if necessary add more until the correct color intensity is achieved.
- Polish as normal.
- Figure out a suitable punishment for anyone who dares to defile your gorgeous sofa again!
See, we said it was easy. You can relax now!
If your leather couch is showing signs of wear, this video contains lots of useful hacks to have it looking as good as new.
If you liked this page on how to repair a tear in a leather sofa, make sure to check out our other useful tips.
